Kia Cadenza: Heater / Auto defoging actuator Repair procedures
Kia Cadenza YG 2016-2025 Service Manual / Heating,Ventilation, Air Conditioning / Heater / Auto defoging actuator Repair procedures
| Inspection |
| 1. |
Ignition "OFF”. |
| 2. |
Disconnect the connector of auto defog control actuator. |
| 3. |
Verify that the auto defog control actuator operates to the
defrost ON mode when connecting 12V to the terminal 3 and grounding
terminal 7. |
| 4. |
Verify that the auto defog control actuator operates to the defog OFF mode when connecting in the reverse.
|
| 5. |
Check the voltage between terminals 5 and 6.
It will feedback current position of actuator to controls. |
| 6. |
If the measured voltage is not specification, substitute with a known-good auto defog actuator and check for proper operation. |
| 7. |
If the problem is corrected, replace the auto defog actuator. |
| Replacement |
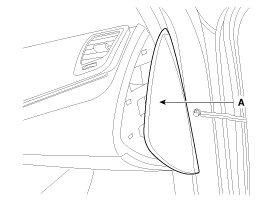
| 1. |
Remove the side cover(A).
|
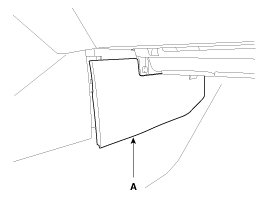
| 2. |
Remove the console side cover [RH] (A).
|
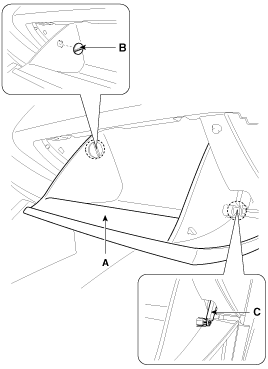
| 3. |
Remove the crash pad lower cover (A) and then disconnect the connector (B).
|
| 4. |
Disconnect the damper (B) from the glove box (A) and then remove the glove box lift (C).
|
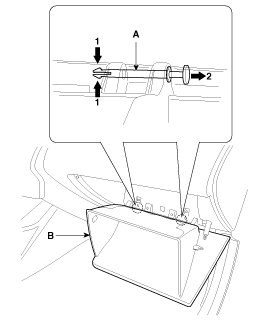
| 5. |
Disconnect the pin (A), then remove the glove box (B).
|
| 6. |
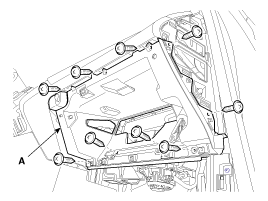
Remove the glove box housing (A) by loosening the mounting screws.
|
| 7. |
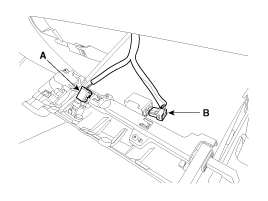
Disconnect the trunk lock switch connector (A) and glove box lamp connector (B).
|
| 8. |
Disconnect the glove box switch connector (A).
|
| 9. |
Remove the shower duct (A).
|
| 10. |
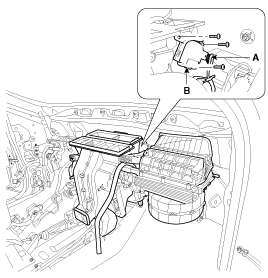
Disconnect the auto defogl actuator connector(A). |
| 11. |
Loosen the mounting screws and then remove the console temp control actuator(B).
|
| 12. |
Installation is the reverse order of removal. |
 Auto defoging actuator Components and Components Location
Component Location
...
 Blower
...
Other information:
Kia Cadenza YG 2016-2025 Owners Manual: Radial-ply tires
Radial-ply tires provide improved tread life, road hazard resistance and smoother high speed ride. The radial- ply tires used on this vehicle are of belted construction and are selected to complement the ride and handling characteristics of your vehicle. Radial-ply tires have the same l ...
Kia Cadenza YG 2016-2025 Service Manual: Blind Spot Detection Variant Coding Description and Operation
Description The used radar frequency of BSD is two, "North America region" and "Except North America region". If it replaces BSD unit, BSD unit has to perform the procedure of variant coding. BSD Variant Coding 1. Select the "BSD Variant Coding" procedure in BSD system. 2. Perform the "BS ...
Copyright © www.kcadenzavg.com 2017-2025


