Kia Cadenza: Lubrication System / Oil Pan Repair procedures
Kia Cadenza YG 2016-2025 Service Manual / Engine Mechanical System / Lubrication System / Oil Pan Repair procedures
| Removal |
| [Lower oil pan] |
| 1. |
Remove the engine room under cover.
(Refer to Engine And Transaxle Assembly - "Engine Room Under Cover") |
| 2. |
Drain the engine oil.
(Refer to Lubrication System - "Engine Oil") |
| 3. |
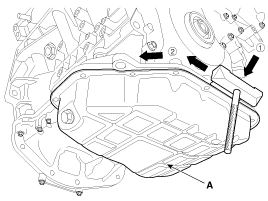
Remove the lower oil pan (A).
Insert the blade of SST(09215-3C000) between the upper oil
pan and lower oil pan. Cut off applied sealer and remove the lower oil
pan.
|

| [Upper oil pan] |
| 1. |
Remove the engine assembly from the vehicle.
(Refer to Engine And Transmission Assembly - "Engine And Transmission Assembly") |
| 2. |
Attach the engine to engine stand for disassembly. |
| 3. |
Remove the timing chain.
(Refer to Timing System - "Timing Chain") |
| 4. |
Remove the lower oil pan.
(Refer to Lubrication System - "Oil Pan") |
| 5. |
Remove the oil pump.
(Refer to Lubrication System - "Oil Pump") |
| 6. |
Remove the LH/RH exhaust manifold stays.
(Refer to Intake And Exhaust System - "Exhaust Manifold") |
| 7. |
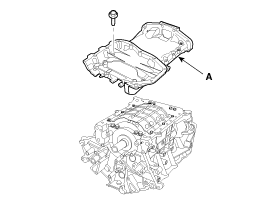
Remove the upper oil pan (A).
Insert the blade of SST(09215-3C000) between the upper oil
pan and sylinder block. Cut off applied sealer and remove the upper oil
pan.
|
| Installation |
| [Lower oil pan] |
| 1. |
Install the lower oil pan (A).
|

| 2. |
After assembly, wait at least 30 minutes before filling the engine with oil. |
| 3. |
Install the other parts in the reverse order of removal. |
| [Upper oil pan] |
| 1. |
Install the upper oil pan.
|

| 2. |
Install the other parts in the reverse order of removal. |
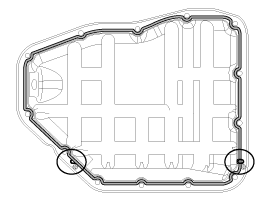
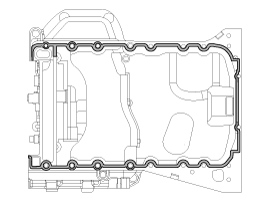
 Oil Pan Components and Components Location
Components
1. Upper oil pan2. Lower oil pan3. Drain plug4. Drain plug gasket
...
 Oil Pump Components and Components Location
Components
1. Oil pump2. O-ring3. Oil pump sprocket4. Oil pump chain cover
...
Other information:
Kia Cadenza YG 2016-2025 Service Manual: Fuel Filler Door Release Actuator Repair procedures
Inspection 1. Open the fuel filler door and remove the fuel filler door release actuator (A) after loosening the mounting bolts. 2. Remove the trunk room left side trim. (Refer to Body - "Interior Trim") 3. Disconnect the release actuator connector (A). 4. Check for continuity betwe ...
Kia Cadenza YG 2016-2025 Owners Manual: Driver Attention Warning (DAW)
DAW displays the driver’s attention level by integrating driving pattern and informs the driver when the vehicle ahead depart while stopping Inattentive Driving Warning Display the driver's attention level and advise taking a break if the attention level is below a certain level. Sy ...
Copyright © www.kcadenzavg.com 2017-2025
