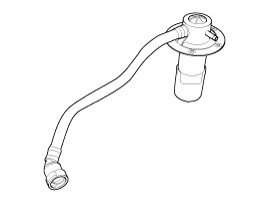
Kia Cadenza: Evaporative Emission Control System / On-board Refueling Vapor Recovery (ORVR) valve Repair procedures
Kia Cadenza YG 2016-2025 Service Manual / Emission Control System / Evaporative Emission Control System / On-board Refueling Vapor Recovery (ORVR) valve Repair procedures
| Removal |
| 1. |
Turn the ignition switch OFF, and then remove battery (-) cable. |
| 2. |
Remove the fuel tank.
(Refer to Fuel System - "Fuel Tank") |
| 3. |
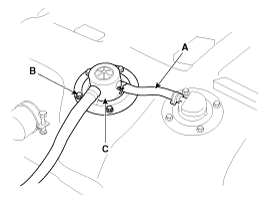
Disconnect the vapor hose (A). |
| 4. |
Remove installation bolts (B), and then remove the ORVR valve (C) from the fuel tank,
|
| Inspection |
| 1. |
Visually check if the valve and gasket seal are deformed or damaged. |
| 2. |
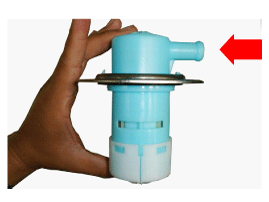
Check if the air is passed smoothly when blowing into the nipple of ORVR valve as below position.
|
| 3. |
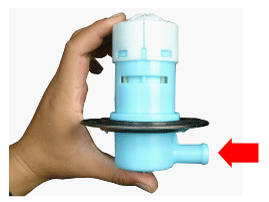
Check if there is resistance when blowing into the nipple of ORVR valve as below position.
|
| Installation |
| 1. |
Install in the reverse order of removal.
|
 On-board Refueling Vapor Recovery (ORVR) valve Description and Operation
Operation
Normal status Full fuelVehicle Rollover / steepValve openValve closeValve close
...
 Fuel Filler Cap Description and Operation
Description
A ratchet tightening device on the threaded fuel filler cap
reduces the chances of incorrect installation, which would seal the fuel
filler. After the gasket on the fuel filler cap ...
Other information:
Kia Cadenza YG 2016-2025 Service Manual: Shift Lever Components and Components Location
Components 1. Shift lever knob & Boots assembly2. Shift lever assembly 3. Control cable assembly ...
Kia Cadenza YG 2016-2025 Service Manual: Description and Operation
Description The hydraulic system consists of oil, an oil filter, an oil pump, and a valve body (valves and solenoid valves). The oil pump is powered by the engine. ATF passes through the oil filter and gets distributed along the oil channels. The oil becomes highly pressurized as it exits ...
Copyright © www.kcadenzavg.com 2017-2025


