Kia Cadenza: Button Engine Start System / Start/Stop Button Repair procedures
Kia Cadenza YG 2016-2025 Service Manual / Body Electrical System / Button Engine Start System / Start/Stop Button Repair procedures
| Removal |
| 1. |
Disconnect the negative (-) battery terminal. |
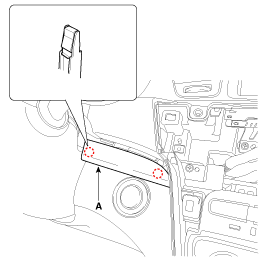
| 2. |
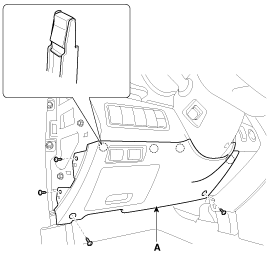
Using a screw driver or remover, remove the center fascia lower panel (A).
|
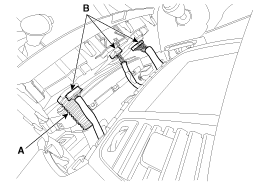
| 3. |
Remove the in-car hose (A) and disconnect the connectors (B) from the heater & A/C control unit.
|
| 4. |
Using a screw driver or remover, remove the crash pad garnish [RH] (A).
|
| 5. |
Remove th AVN head unit (A) after loosening the mounting screws.
|
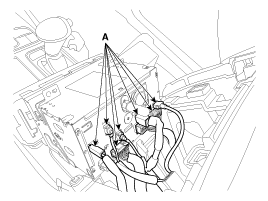
| 6. |
Disconnect the connectors (A) from the AVN head unit.
|
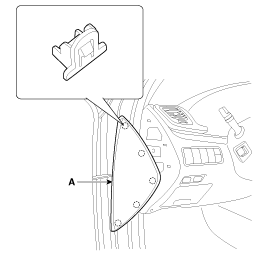
| 7. |
Using a screw driver or remover, remove the crash pad side cover (A).
|
| 8. |
Remove the crash pad lower panel (A) after loosening the mounting screws.
|
| 9. |
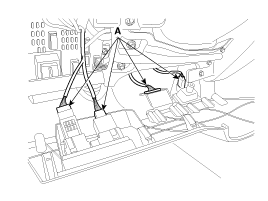
Disconnect the connectors (A).
|
| 10. |
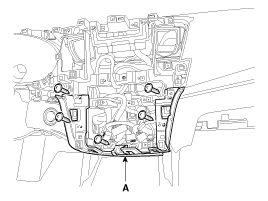
Remove the crash pad center panel (A) after loosening the mounting screws.
|
| 11. |
Remove the ignition key grommet (A) after loosening the mounting screws.
|
| 12. |
Disconnect the start/stop button connector (A).
|
| 13. |
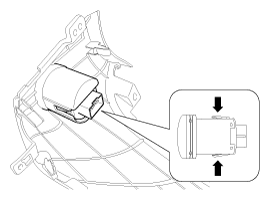
Remove the start/stop button (A) by pushing the both sides of the hooks.
|
| Installation |
| 1. |
Install the start/stop button. |
| 2. |
Install the crash pad center panel, crash pad lower panel,
AVN head unit, heater & A/C control unit and center fascia lower
panel. |
 Start/Stop Button Components and Components Location
Component
...
Other information:
Kia Cadenza YG 2016-2025 Service Manual: Rear Oil Seal Repair procedures
Removal 1. Remove the transaxle assembly. (Refer to Automatic Transaxle System - "Automatic Transaxle") 2. Remove the drive plate. (Refer to Cylinder Block - "Drive Plate") 3. Remove the rear oil seal (A). 4. Remove the rear oil seal case (A). Installation 1. Install the rear ...
Kia Cadenza YG 2016-2025 Owners Manual: ESC operation
ESC ON condition When the ENGINE START/STOP button is turned ON, ESC and ESC OFF indicator lights illuminate for approximately 3 seconds, then ESC is turned on. Press the ESC OFF button for at least half a second after turning the vehicle ON to turn ESC off. (ES ...
Copyright © www.kcadenzavg.com 2017-2025


