Kia Cadenza: Seat belt restraint system / Lap/shoulder belt
Height adjustment
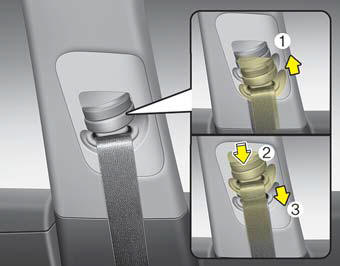
You can adjust the height of the shoulder belt anchor to one of 4 positions for maximum comfort and safety.
The height of the adjusting seat belt should not be too close to your neck. You will not be getting the most effective protection. The shoulder portion should be adjusted so that it lies across your chest and midway over your shoulder near the door and not your neck.
To adjust the height of the seat belt anchor, lower or raise the height adjuster into an appropriate position.
To raise the height adjuster, pull it up (1). To lower it, push it down (3) while pressing the height adjuster button (2).
Release the button to lock the anchor into position. Try sliding the height adjuster to make sure that it has locked into position.
Improperly positioned seat belts can cause serious injuries in an accident.
WARNING - Shoulder belt positioning
Never position the shoulder belt across your neck or face.
WARNING - Seat belt replacement
]'Replace your seat belts after being in an accident. Failure to replace seat belts after an accident could leave you with damaged seat belts that will not provide protection in the event of another collision.
To fasten your seat belt:
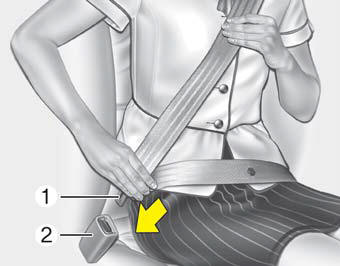
To fasten your seat belt, pull it out of the retractor and insert the metal tab (1) into the buckle (2). There will be an audible "click" when the tab locks into the buckle.
The seat belt automatically adjusts to the proper length only after the lap belt portion is adjusted manually so that it fits snugly around your hips. If you lean forward in a slow, easy motion, the belt will extend and let you move around. If there is a sudden stop or impact, however, the belt will lock into position. It will also lock if you try to lean forward too quickly.
✽ NOTICE
If you are not able to pull out the seat belt from the retractor, firmly pull the belt out and release it. Then you will be able to pull the belt out smoothly.
WARNING
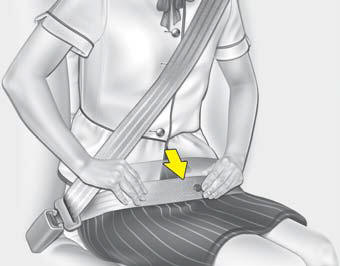
You should place the lap belt portion as low as possible and snugly across your hips, not on your waist. If the lap belt is located too high on your waist, it may increase the chance of injury in the event of a collision. Both arms should not be under or over the belt. Rather, one should be over and the other under, as shown in the illustration.
Never wear the seat belt under the arm near the door.
To release the seat belt:
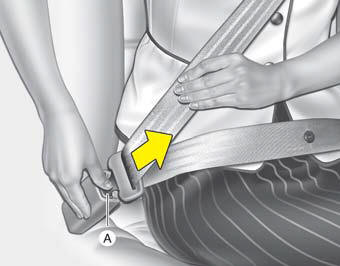
The seat belt is released by pressing the release button (A) in the locking buckle. When it is released, the belt should automatically draw back into the retractor.
If this does not happen, check the belt to be sure it is not twisted, then try again.
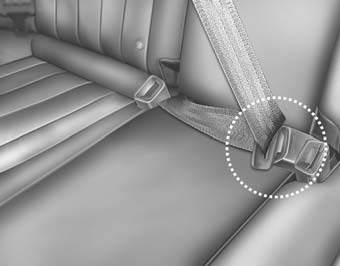
When using the rear center seat belt the buckle with the “CENTER” mark must be used.
✽ NOTICE
If you are not able to pull out the safety belt from the retractor, firmly pull the belt out and release it. After release, you will be able to pull the belt out smoothly.
 Seat belt warning
Driver’s seat belt warning
As a reminder to the driver, the seat
belt warning lights will illuminate for
approximately 6 seconds each time
you turn the Engine Start/Stop button
ON regardl ...
 Pre-tensioner seat belt
Your vehicle is equipped with driver's
and front passenger's pre-tensioner
seat belts (retractor pretensioner and
EFD (Emergency Fastening Device)).
The pre-tensioner seat belts may be
act ...
Other information:
Kia Cadenza YG 2016-2025 Service Manual: Compass Mirror Repair procedures
Calibration Procedure If the compass has been calibrated or set to variance zone number incorrectly, or you are driving in specific places (tunnel, parking lot in building, underground parking lot, near transformer substation, etc.), the below conditions may occur. • The display r ...
Kia Cadenza YG 2016-2025 Service Manual: Piston and Connecting Rod Components and Components Location
Components 1. Piston ring2. Piston pin3. Snap ring4. Piston5. Connecting rod6. Connecting rod upper bearing7. Connecting rod lower bearing8. Connecting rod bearing cap ...
