Kia Cadenza: Adaptive Front Lighting System / Adaptive Front Lighting System Repair procedures
Kia Cadenza YG 2016-2025 Service Manual / Body Electrical System / Adaptive Front Lighting System / Adaptive Front Lighting System Repair procedures
| Removal |
| 1. |
Disconnect the negative (-) battery terminal. |
| 2. |
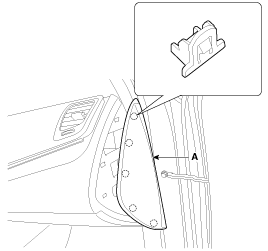
Using a screwdriver or remover, remove the crash pad side cover (A).
[RH]
|
| 3. |
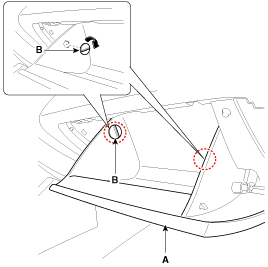
Disconnect the stopper (B) from the glove box (A).
|
| 4. |
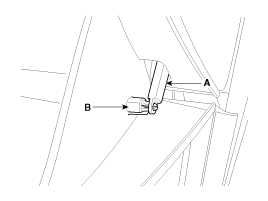
Disconnect the air damper (A) from the glove box (B).
|
| 5. |
Disconnect the pins (A) and then remove the glove box (B).
|
| 6. |
After loosening the mounting screws, then remove the crash pad under cover [RH] (A).
|
| 7. |
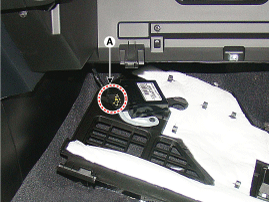
Disconnect the connector (A) from the AFLS unit.
|
| 8. |
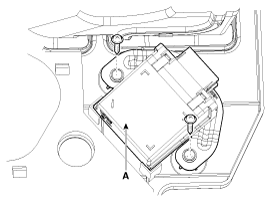
Remove the AFLS unit (A), after loosening the mounting screws.
|
| Installation |
| 1. |
Install the AFLS unit. |
| 2. |
Install the crash pad under cover and glove box. |
| 3. |
Connect the negative (-) battery terminal. |
 Adaptive Front Lighting System Description and Operation
Description
AFLS Unit(ECU)
AFLS located in Cockpit Module is provided information of vehicle (steering wheel signal,vehicle speed, inclination of vehicle).
Based on provided information , it calc ...
 Height Sensor Repair procedures
Removal
Height Sensor
1.
Disconnect the negative (-) battery terminal.
2.
Remove the height sensor linkage (A) installed on the front axle and rear axle.
[Front]
[Rear]
Installation
Hei ...
Other information:
Kia Cadenza YG 2016-2025 Owners Manual: System description
Rear Cross-Traffic Collision Warning Rear Cross-Traffic Collision Warning uses rear corner radar sensors to monitor the approaching cross traffic from the left and right side of the vehicle when your vehicle is in reverse. The warning distance varies relative to the approaching veh ...
Kia Cadenza YG 2016-2025 Service Manual: Purge Control Solenoid Valve (PCSV) Description and Operation
Description Purge Control Solenoid Valve (PCSV) is installed on the surge tank and controls the passage between the canister and the intake manifold. It is a solenoid valve and is open when the ECM grounds the valve control line. When the passage is open (PCSV ON), fuel vapor stored in th ...
Copyright © www.kcadenzavg.com 2017-2025


