Kia Cadenza: Air bag - advanced supplemental restraint system / Side air bag
Your vehicle is equipped with a side air bag in each front seat. The purpose of the air bag is to provide the vehicle's driver and/or the front passenger with additional protection than that offered by the seat belt alone.
- The side air bags are designed to deploy during certain side-impact collisions, depending on the crash severity, angle, speed and point of impact. However, when side deployment threshold is satisfied at frontimpact, side air bags may deploy.
- The side air bags may deploy on the side of the impact or on both sides.
- The side and/or curtain air bags on both sides of the vehicle will deploy if a rollover or possible rollover is detected.
- The side air bags are not designed to deploy in all side impact or rollover situations.
WARNING - Unexpected deployment
Avoid impact to the side impact airbag sensor when the Engine Start/Stop button is ON to prevent unexpected deployment of the side air bag.
- The side air bag is supplemental to the driver's and the passenger's seat belt systems and is not a substitute for them. Therefore your seat belts must be worn at all times while the vehicle is in operation.
- For best protection from the side air bag system and to avoid being injured by the deploying side air bag, both front seat occupants should sit in an upright position with the seat belt properly fastened. The driver's hands should be placed on the steering wheel at the 9:00 and 3:00 positions. The passenger's arms and hands should be placed on their laps.
WARNING - Deployment
Do not install any accessories including seat covers, on the side or near the side air bag as this may affect the deployment of the side air bags.
- If seat or seat cover is damaged, have the vehicle checked and repaired by an authorized Kia dealer. Inform the dealer that your vehicle is equipped with side air bags and an occupant detection system.
WARNING - Flying objects
Do not place any objects (an umbrella, bag, etc.) between the front door and the front seat. Such objects may become dangerous projectiles if the side airbag inflates.
WARNING - No attaching objects
- Do not place any objects over the air bag or between the air bag and yourself. Also, do not attach any objects around the area the air bag inflates such as the door, side door glass, front and rear pillar.
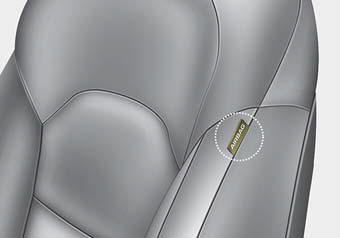
- Do not put any objects between the side airbag label and seat cushion. It could cause harm if the vehicle is in a crash severe enough to cause the air bags to deploy.
- Never place or insert any object into any small opening near side airbag labels attached to the vehicle seats. When the air bag deploys, the object may affect the deployment and result in unexpected accident or bodily harm.
- Do not install any accessories on the side or near the side air bags.
 Driver's and passenger's front
air bag
Driver's and passenger's front
air bag
Your vehicle is equipped with an
Advanced Supplemental Restraint
(Air Bag) System and lap/shoulder
belts at both the driver and passenger
seating position.
The indication of the system's pr ...
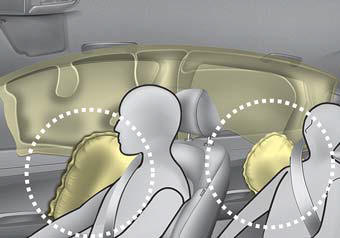
 Curtain air bag
Curtain air bags are located along
both sides of the roof rails above the
front and rear doors.
They are designed to help protect
occupants in certain side impacts
and to help pre ...
Other information:
Kia Cadenza YG 2016-2025 Service Manual: Telemetics Unit (TMU) Components and Components Location
Component Connector Pin Specification No.Pin NameTypeFromToDescription (Wiring Spec.)1GNDDC GroundTMUBatteryConnected to battery ground2GNDDC GroundTMUBatteryConnected to battery ground3-----4-----5-----6-----7-----8-----9-----10-----11-----12HS CAN (-)Data I/OBUSBUSHigh Speed CAN bus low13HS ...
Kia Cadenza YG 2016-2025 Service Manual: Parking Brake Assembly Repair procedures
Removal Parking Brake Pedal 1. Remove the main crash pad. (Refer to the Body group-crash pad) 2. Remove the cowl cross bar. (Refer to the Body group - Crash pad) 3. Disconnect the parking brake switch connector (A). 4. Remove the parking brake pedal mounting bolts (A) and nut.(B) ...
